이전 포스팅에 이어 작성하겠습니다.
[안드로이드] Daum검색 Rest API를 이용해 책 검색 앱 만들기 (2)
이전 포스팅에 이어 작성하겠습니다. [안드로이드] Daum검색 Rest API를 이용해 책 검색 앱 만들기 (1) Kako Developers(https://developers.kakao.com) 사이트에서는 Daum검색과 관련된 다양한 Rest API를 제공합니다
develop-oj.tistory.com
이미지 변환과 RecyclerView를 사용하기 위해 app/build.gradle에 종속성을 추가합니다.
// Glide
implementation 'com.github.bumptech.glide:glide:4.11.0'
annotationProcessor 'com.github.bumptech.glide:compiler:4.11.0'
// Recyclerview
implementation 'androidx.recyclerview:recyclerview:1.2.1'
이미지 변환에는 Glide 라이브러리를 사용하겠습니다.
먼저 RecyclerViewHolder의 layout을 구성합니다.
item_book_preview.xml
<?xml version="1.0" encoding="utf-8"?>
<androidx.constraintlayout.widget.ConstraintLayout xmlns:android="http://schemas.android.com/apk/res/android"
    xmlns:app="http://schemas.android.com/apk/res-auto"
    android:layout_width="match_parent"
    android:layout_height="wrap_content"
    android:padding="8dp">

    <ImageView
        android:id="@+id/iv_article_image"
        android:layout_width="60dp"
        android:layout_height="87dp"
        android:scaleType="fitXY"
        app:layout_constraintStart_toStartOf="parent"
        app:layout_constraintTop_toTopOf="parent" />

    <TextView
        android:id="@+id/tv_title"
        android:layout_width="0dp"
        android:layout_height="wrap_content"
        android:layout_marginStart="8dp"
        android:maxLines="2"
        android:text="TITLE"
        android:textColor="#000000"
        android:textSize="16sp"
        android:textStyle="bold"
        app:layout_constraintEnd_toEndOf="parent"
        app:layout_constraintStart_toEndOf="@id/iv_article_image"
        app:layout_constraintTop_toTopOf="parent" />

    <TextView
        android:id="@+id/tv_author"
        android:layout_width="0dp"
        android:layout_height="wrap_content"
        android:layout_marginStart="8dp"
        android:text="AUTHOR"
        android:textColor="#000000"
        android:textSize="14sp"
        app:layout_constraintEnd_toEndOf="parent"
        app:layout_constraintStart_toEndOf="@id/iv_article_image"
        app:layout_constraintTop_toBottomOf="@id/tv_title" />

    <TextView
        android:id="@+id/tv_datetime"
        android:layout_width="0dp"
        android:layout_height="wrap_content"
        android:layout_marginStart="8dp"
        android:text="DATETIME"
        android:textColor="#000000"
        android:textSize="14sp"
        app:layout_constraintEnd_toEndOf="parent"
        app:layout_constraintStart_toEndOf="@id/iv_article_image"
        app:layout_constraintTop_toBottomOf="@id/tv_author" />

</androidx.constraintlayout.widget.ConstraintLayout>
그리고 위 레이아웃과 RecyclerView를 연결해줄 Adapter를 작성합니다.
일반적인 RecyclerView()보다 성능이 좋은 ListAdapter()를 사용해보겠습니다.
BookSearchAdapter
class BookSearchAdapter(private val context: Context)
    : ListAdapter<Document, BookSearchAdapter.BookSearchViewHolder>(BookDiffCallBack) {
    override fun onCreateViewHolder(parent: ViewGroup, viewType: Int): BookSearchViewHolder {
        return BookSearchViewHolder(
            ItemBookPreviewBinding.inflate(LayoutInflater.from(parent.context), parent, false)
        )
    }

    override fun onBindViewHolder(holder: BookSearchViewHolder, position: Int) {
        val document = currentList[position]
        holder.bind(document)
    }

    inner class BookSearchViewHolder(val binding: ItemBookPreviewBinding) :
        RecyclerView.ViewHolder(binding.root) {
        fun bind(document: Document) {
            val author = document.authors.toString().removeSurrounding("[", "]")
            val publisher = document.publisher
            val date = if (document.datetime.isNotEmpty()) {
                document.datetime.substring(0, 10)
            } else { "" }

            // UI에 데이터 표시
            itemView.apply {
                Glide.with(context).load(document.thumbnail).into(binding.ivArticleImage)
                binding.tvTitle.text = document.title
                binding.tvAuthor.text = "$author ㅣ $publisher"
                binding.tvDatetime.text = date
            }
        }
    }

    companion object {
        private val BookDiffCallBack = object : DiffUtil.ItemCallback<Document>() {
            // 두 아이템이 동일한 아이템인지 확인
            override fun areItemsTheSame(oldItem: Document, newItem: Document): Boolean {
                return oldItem.isbn == newItem.isbn
            }
            // areItemsTheSame() -> true일 때 호출, 두 아이템이 동일한 내용인지 확인
            override fun areContentsTheSame(oldItem: Document, newItem: Document): Boolean {
                return oldItem == newItem
            }
        }
    }
}
companiton object 블럭에서 Diffutil.Callback을 구현해야 합니다.
DiffUtil은 기존의 리스트와 변경된 리스트의 차이를 계산하여 변경할 아이템들의 결과를 반환하는 클래스입니다.
onCreateViewHolder()에서 뷰 홀더 객체를 생성합니다.
그리고 onBindViewHolder()에서 position에 따른 각 뷰를 뷰 홀더에 바인딩해줍니다.
마지막으로 inner class인 BookSearchViewHolder에서 바인딩된 각각의 뷰와 데이터를 연결합니다.
activity_main.xml
<?xml version="1.0" encoding="utf-8"?>
<androidx.constraintlayout.widget.ConstraintLayout xmlns:android="http://schemas.android.com/apk/res/android"
    xmlns:app="http://schemas.android.com/apk/res-auto"
    xmlns:tools="http://schemas.android.com/tools"
    android:layout_width="match_parent"
    android:layout_height="match_parent"
    tools:context=".ui.view.MainActivity">

    <com.google.android.material.textfield.TextInputLayout
        android:id="@+id/et_search_layout"
        style="@style/Widget.MaterialComponents.TextInputLayout.OutlinedBox"
        android:layout_width="0dp"
        android:layout_height="wrap_content"
        android:hint="Search.."
        android:padding="4dp"
        app:endIconMode="clear_text"
        app:layout_constraintEnd_toEndOf="parent"
        app:layout_constraintStart_toStartOf="parent"
        app:layout_constraintTop_toTopOf="parent">

        <com.google.android.material.textfield.TextInputEditText
            android:id="@+id/et_search"
            android:layout_width="match_parent"
            android:layout_height="match_parent"
            android:inputType="textAutoComplete" />

    </com.google.android.material.textfield.TextInputLayout>

    <androidx.recyclerview.widget.RecyclerView
        android:id="@+id/rv_result"
        android:layout_width="0dp"
        android:layout_height="0dp"
        android:scrollbars="vertical"
        app:layout_constraintBottom_toBottomOf="parent"
        app:layout_constraintEnd_toEndOf="parent"
        app:layout_constraintStart_toStartOf="parent"
        app:layout_constraintTop_toBottomOf="@id/et_search_layout" />

</androidx.constraintlayout.widget.ConstraintLayout>
MainActivity
class MainActivity : AppCompatActivity() {
    private val binding: ActivityMainBinding by lazy {
        ActivityMainBinding.inflate(layoutInflater)
    }
    private val bookSearchRepository = BookSearchRepositoryImpl()
    private val factory = BookSearchViewModelFactory(bookSearchRepository)
    val viewModel: BookSearchViewModel by viewModels() { factory }

    private lateinit var bookSearchAdapter: BookSearchAdapter

    override fun onCreate(savedInstanceState: Bundle?) {
        super.onCreate(savedInstanceState)
        setContentView(binding.root)

        setRecyclerView()
        searchBooks()

        // BookSearchViewModel의 LiveData 관찰
        viewModel.searchResult.observe(this) {
            bookSearchAdapter.submitList(it.documents)
        }
    }
    // RecyclerView 세팅
    private fun setRecyclerView() {
        bookSearchAdapter = BookSearchAdapter(this)
        binding.rvResult.apply {
            setHasFixedSize(true)    // 고정된  size를 가진다고 명시
            addItemDecoration(DividerItemDecoration(applicationContext,DividerItemDecoration.VERTICAL)) // 구분선 넣기
            layoutManager = LinearLayoutManager(applicationContext,LinearLayoutManager.VERTICAL,false)
            adapter = bookSearchAdapter
        }
    }
    // EditText의 검색어 입력 시간에 따른 리스트 변경
    private fun searchBooks() {
        var startTime = System.currentTimeMillis()
        var endTime : Long

        binding.etSearch.addTextChangedListener {
            endTime = System.currentTimeMillis()
            if (endTime - startTime >= 100L) {
                val query = it.toString().trim()
                if (query.isNotEmpty()) {
                    viewModel.searchBooks(query)
                }
            }
            startTime = endTime
        }
    }
}
마지막으로 MainActivity와 activity_main.xml을 작성합니다.
사용자가 검색창에 검색어를 입력하면 viewModel의 searchBooks()로 검색어를 전달합니다.
전달받은 검색어는 Repository.searchBooks()를 호출하며 SearchResponse를 반환합니다.
해당 Response는 LiveData(searchResult)가 observe하고 있기 때문에 데이터가 실시간으로 Adapter에 전달되어 리스트가 갱신되게 됩니다.
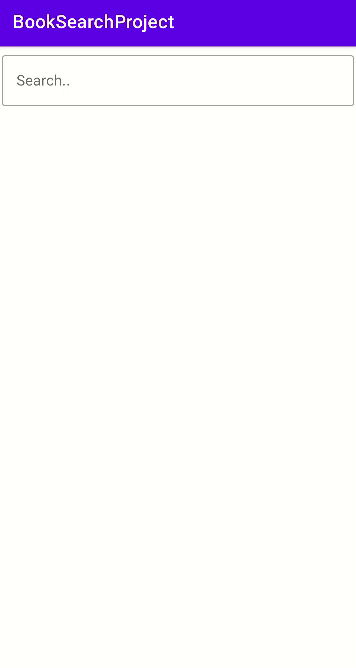
실행결과

간단한 REST API를 호출하는 프로그램을 구현하면서 ViewModel, LiveData, Repository 패턴을 적용해 보았습니다.
클래스, 인터페이스 파일도 많고 조금 복잡해 보이지만 점점 익숙해져 가는 것 같습니다.. ㅎㅎ
* [인프런] "냉동코더의 알기 쉬운 Modern Android Development 입문" 참고
'Android' 카테고리의 다른 글
| [Android] ListAdapter 사용 중 리스트가 갱신되지 않은 문제 (1) | 2023.01.13 |
|---|---|
| [Android] 안드로이드의 4대 구성요소(4대 컴포넌트) (1) | 2023.01.10 |
| [Android] Daum검색 Rest API를 이용해 책 검색 앱 만들기 (2) (0) | 2023.01.08 |
| [Android] Daum검색 Rest API를 이용해 책 검색 앱 만들기 (1) (0) | 2023.01.08 |
| [Android] BottomNavigationView(하단 네비게이션) 구현하기 (0) | 2023.01.06 |


